Southern Comfort, Vegan Style: Soulful Recipes That Hug Your Taste Buds
4/26/20255 min read


Southern comfort food is renowned for its rich flavors, hearty textures, and nostalgic appeal. Transitioning these classics into vegan delights not only caters to a growing plant-based audience but also introduces innovative culinary experiences.
🥘 Why Vegan Southern Comfort Food?
The essence of Southern cuisine lies in its spices, preparation methods, and the love infused into each dish—not necessarily in animal products. By focusing on these elements, vegan versions can capture the soul of traditional recipes
🍽️ Must-Try Vegan Southern Comfort Recipes
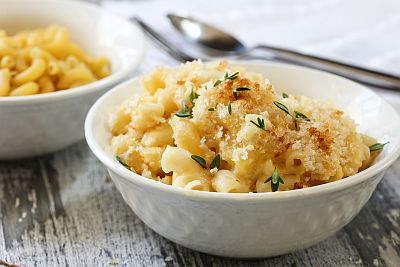
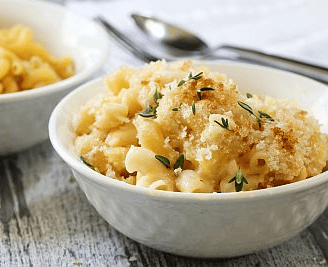
1. Vegan Mac & Cheese
Description: A creamy, cheesy delight made with a cashew-based sauce and nutritional yeast, offering classic comfort without dairy.
Prep Time: 10 minutes
Cook Time: 10 minutes
Total Time: 20 minutes
Servings: 8
Calories: 304 kcal per serving
Ingredients:
For the Mac & Cheese:
1 1/2 cups raw cashews
2 cups water (or less if not using vegan cheese)
3 tablespoons fresh lemon juice
1/2 cup nutritional yeast
1/4 teaspoon turmeric
1/2 teaspoon garlic powder
1 1/2 teaspoons salt
1 (7-oz) bag shredded vegan cheddar cheese (optional)
12 ounces elbow pasta
Optional Breadcrumb Topping:
1 1/2 cups panko breadcrumbs
4 tablespoons vegan butter, melted
1/4 teaspoon smoked paprika
Instructions:
Prepare the Cashews: Cover cashews with boiling water and let sit for 5 minutes to soften.
Cook Pasta: Cook 12 ounces of elbow pasta according to package instructions, drain, and set aside.
Make the Cheese Sauce: Drain cashews and discard soaking water. In a blender, combine cashews, 2 cups water, lemon juice, nutritional yeast, turmeric, garlic powder, salt, and optional vegan cheddar cheese. Blend until very smooth.
Stovetop Version: Return pasta to the pot, pour in the cheese sauce, and stir until it thickens. Serve immediately.
Baked Version: Preheat oven to 350°F (175°C). Lightly grease a 9x13-inch casserole dish. Mix panko breadcrumbs with melted vegan butter and smoked paprika. Add drained pasta to the casserole dish, pour in cheese sauce, stir to coat. Sprinkle breadcrumb mixture on top and bake uncovered for 15 minutes. Broil for a few minutes until golden brown. Serve immediately.
Notes:
If not using vegan cheese, reduce water to 1 cup for a thicker sauce, especially if not baking.
Leftovers last 3-4 days in the refrigerator. Add warm water to thin the sauce when reheating.
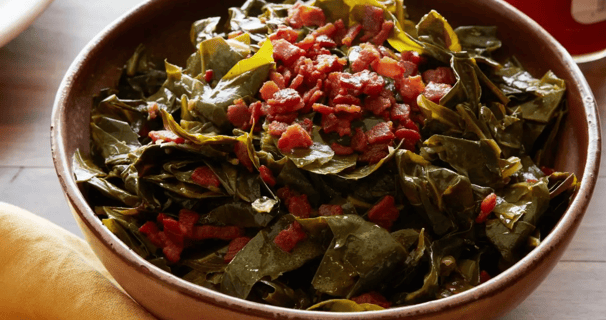
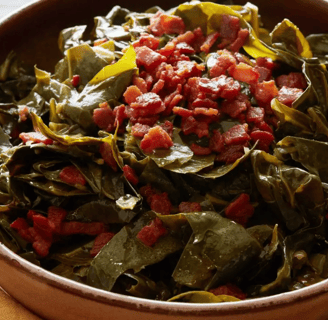
2. Smoky Collard Greens
Description: Slow-cooked collard greens infused with liquid smoke and seasoned with garlic and onions, delivering depth and warmth.
Prep Time: 5 minutes
Cook Time: 1 hour 30 minutes
Total Time: 1 hour 35 minutes
Servings: 4
Calories: 60 kcal per serving
Ingredients:
1 tablespoon olive oil
1 medium yellow onion, diced
4 garlic cloves, minced
1/2 teaspoon smoked paprika
1/4-1/2 teaspoon hot pepper flakes (to taste)
2 tablespoons apple cider vinegar
1-2 bunches collard greens (about 1.5 pounds untrimmed), stems removed, julienned into thin ribbons, cut in half, rinsed, and patted dry
2 1/2-3 cups low-sodium vegetable broth (plus more as needed)
3/4 to 1 teaspoon liquid smoke
1 teaspoon sea salt (to taste)
1/4 teaspoon ground black pepper (to taste)
Instructions:
Prepare Collard Greens: Remove stems from collard greens, julienne into thin ribbons, cut in half, rinse thoroughly, and pat dry.
Cook Onions and Garlic: Heat 1 tablespoon olive oil in a large skillet over medium heat. Add diced yellow onion and 1/2 teaspoon salt. Cook for 5-7 minutes until softened.
Add Spices: Add minced garlic cloves, smoked paprika, and hot pepper flakes. Cook for 30 seconds until fragrant.
Deglaze: Add apple cider vinegar and scrape up any browned bits from the bottom of the pan.
Wilt Greens: Add collard greens in handfuls, stirring until wilted before adding more.
Simmer: Pour in vegetable broth, liquid smoke, remaining salt, and black pepper. Bring to a simmer, cover, and cook on low for 60 to 90 minutes until tender, adding more broth if needed to maintain about an inch of liquid.
Adjust Seasoning: Taste and add more liquid smoke, sea salt, or pepper if desired.
Storage:
Keep leftovers in a covered container in the fridge for up to 4 days or freeze for up to 3 months. Thaw overnight in the fridge and reheat on low heat or in the microwave.
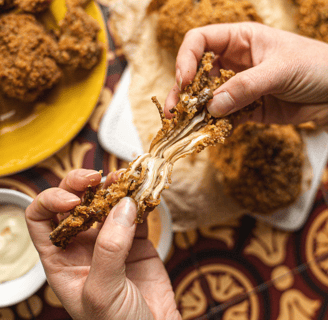
3. Crispy Fried Oyster Mushrooms
Description: A delightful alternative to fried chicken, these mushrooms are battered and fried to golden perfection, offering a satisfying crunch.
Prep Time: 10 minutes
Cook Time: 10 minutes
Total Time: 20 minutes
Servings: 2
Calories: 387 kcal per serving (note: based on uncooked mushrooms, frying oil not included)
Ingredients:
150g oyster mushrooms
1 1/2 cups plain flour
1 1/2 teaspoons paprika powder
1 1/2 teaspoons garlic powder
1 1/2 teaspoons onion powder
1 teaspoon turmeric powder
1/4 teaspoon cayenne pepper (adjust for spiciness)
1 teaspoon salt
Cracked pepper
Oil for frying (canola oil, avocado oil, sunflower oil, grape seed oil, or vegetable oil)
Optional Dipping Sauces:
Creamy BBQ: Equal parts mayonnaise and BBQ sauce with a dash of apple cider vinegar
Sriracha aioli
Ketchup
Honey mustard
Instructions:
Prepare Mushrooms: Wipe oyster mushrooms with a damp paper towel to remove dirt.
Make Dry Mixture: In a large bowl, mix flour with paprika, garlic powder, onion powder, turmeric, cayenne pepper, salt, and cracked pepper until well combined.
Make Wet Batter: In a second bowl, mix 1/3 cup of the dry mixture with 3/4 cups water to make a smooth batter.
Coat Mushrooms: Dip each mushroom into the wet batter, then into the dry mixture. Double coat by dipping back into the wet batter and then into the dry mixture again, ensuring they are fully coated.
Fry: Heat oil in a pot over high heat. Fry mushrooms in batches (don’t overcrowd) until golden brown.
Drain and Serve: Remove mushrooms, place on paper towels to drain excess oil, then transfer to a cooling rack to keep crispy. Serve with your choice of dipping sauce or use in a vegan "chicken" sandwich.
Tips:
Don’t wash mushrooms with water; use a damp paper towel to clean.
Double coat for extra crispiness and ensure all corners are coated.
Test oil readiness by dropping a pinch of flour; if it bubbles, it’s ready.
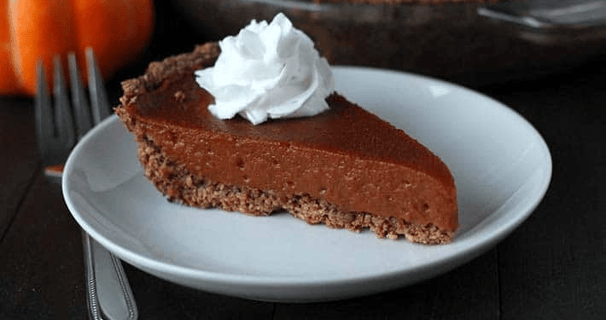
4. Vegan Sweet Potato Pie
Description: Wonderfully rich and packed with flavor, this pie is extremely simple to make and tastes like heaven. It’s adapted from a vegan pumpkin pie recipe.
Prep Time: 15 minutes
Cook Time: 1 hour
Total Time: 1 hour 15 minutes
Servings: 10
Calories: 260 kcal per slice (including homemade vegan pie crust, excluding vegan whipped cream and chopped pecans)
Ingredients:
1 1/2 cups sweet potato purée (canned or fresh)
1 can (400ml) full-fat coconut milk (unsweetened)
3/4 cup brown sugar
2 tablespoons cornstarch
1 teaspoon vanilla extract
1/2 teaspoon salt
1 teaspoon cinnamon
1/2 teaspoon nutmeg
1/4 teaspoon ground cloves
1/4 teaspoon ground ginger
1 unbaked 9-inch vegan pie crust
Instructions:
Preheat Oven: Preheat oven to 350°F (180°C).
Make Filling: In a blender, combine sweet potato purée, coconut milk, brown sugar, cornstarch, vanilla extract, salt, cinnamon, nutmeg, ground cloves, and ground ginger. Blend until smooth.
Fill Crust: Pour the mixture over an unbaked 9-inch vegan pie crust in a pie dish and smooth down.
Bake: Bake for 60 minutes. At the 40-minute mark, tent the pie with foil to prevent the crust from over-browning, then bake for the remaining 20 minutes.
Cool: Allow the pie to cool on the counter for at least 2 hours before slicing. For better slicing, chill in the fridge.
Serve: Serve with vegan whipped cream and chopped pecans for decoration.
Sweet Potato Purée:
Use canned sweet potato purée or make your own by baking peeled and chopped sweet potatoes on a parchment-lined tray at 350°F for 30-35 minutes until soft. Cool, then purée. A 2.2-pound (1kg) bag will give you slightly more than needed.
Vegan Pie Crust:
You can make your own using a vegan pie crust recipe or use a store-bought unbaked 9-inch crust.
Make Ahead & Storing:
This pie can be made the day before and stored covered in the fridge overnight (ideal). Leftovers will keep covered in the fridge for 5-7 days. It’s also freezer friendly: freeze the whole baked pie, thaw in the fridge overnight, then serve as usual.


Explore
Discover tips for a cozy, essential lifestyle.
Connect
Support
contact@everynest.com
+1234567890
© 2025. All rights reserved.